
SkyTrak+ teardown: how to open it and replace the USB-C port
This SkyTrak+ golf launch monitor came in with an intermittent USB-C port. The charging cable had to be held in one exact position for the unit to charge or connect, and any movement dropped it again.
A loose USB-C port is usually a quick job. On a SkyTrak+ it isn't, because the socket sits underneath all of the sensors and the whole thing is built to stay closed. When we took the job on we couldn't find a published teardown of the SkyTrak+ anywhere, only guides for the original SkyTrak, so we photographed each stage on the way in.
What was wrong with the port
Once we got to it, the fault was obvious. The USB-C socket had been torn off its mounts. It was held on by the factory glue and a single metal leg, and several of its pins were no longer connected to the board. That explains the "only works if you hold the cable just so" symptom: the socket was moving every time the cable did.
This wasn't wear. A socket doesn't pull its own legs out. It's the kind of damage you get when a cable is yanked or the unit is knocked over while it's plugged in.
Getting inside a SkyTrak+
Opening this unit is slow, careful work, and some of it can't be undone cleanly. This is the route on this unit:
Step 1. Start underneath. A panel on the bottom is held by two screws, one of them hidden under the warranty label. Pry the panel off to reach the battery, and disconnect the battery before going any further.
Step 2. Remove the four screws holding in the bottom of the unit.
Step 3. The side panels simply pull off, worked free with a plastic spudger. With them off, the clips down the left and right sides can be released from underneath.
Step 4. Two long Phillips screws sit deep inside the unit, reached through the openings in the chassis. You need a long driver. Our 300 mm one reaches them easily. These two screws hold the top cover on.
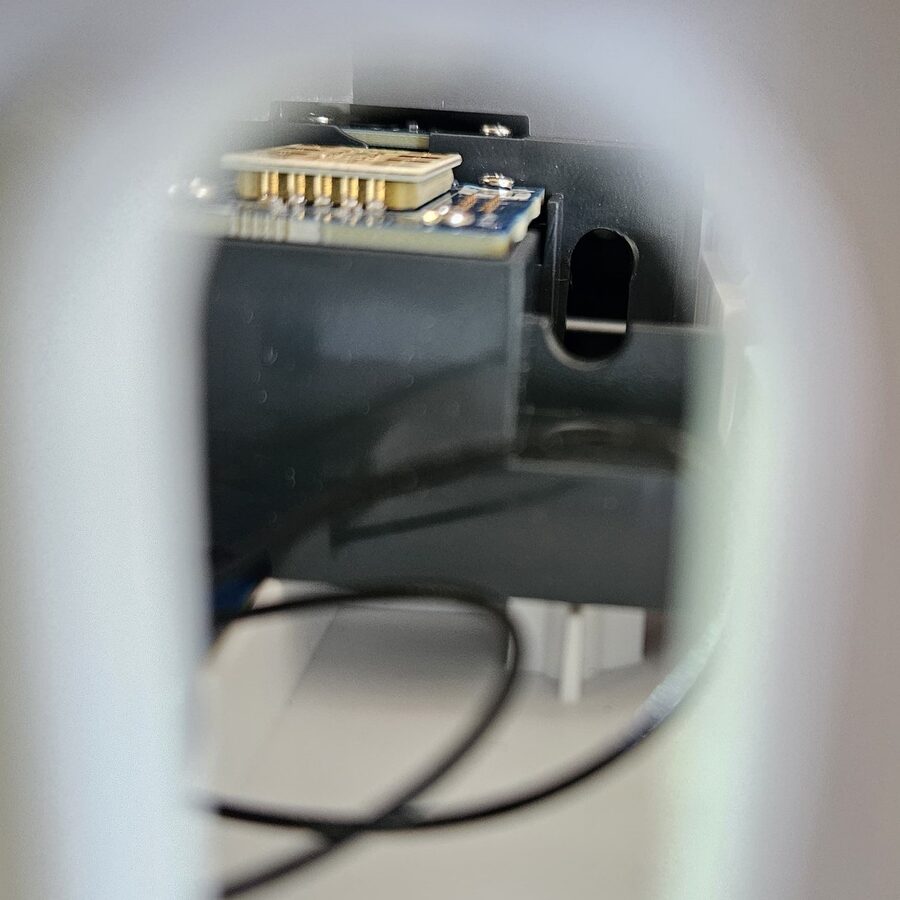
One of the two deep screws, seen through an opening in the chassis. A 300 mm Phillips driver reaches it.
Step 5. The top cover then has to be worked off a little at a time, one side and then the other. On this unit the top cover also held the front panel on with mushroom-headed plastic posts that were heat-staked (melted over) at the factory. There's no way to release those without force, so expect some minor damage there, and small marks from the clips. On reassembly the front panel has to be secured again so it doesn't rattle or work loose.
Step 6. With the top cover off you can see the main board under its heatsink, the two radar boards, and a black shield covering the camera and flash area.
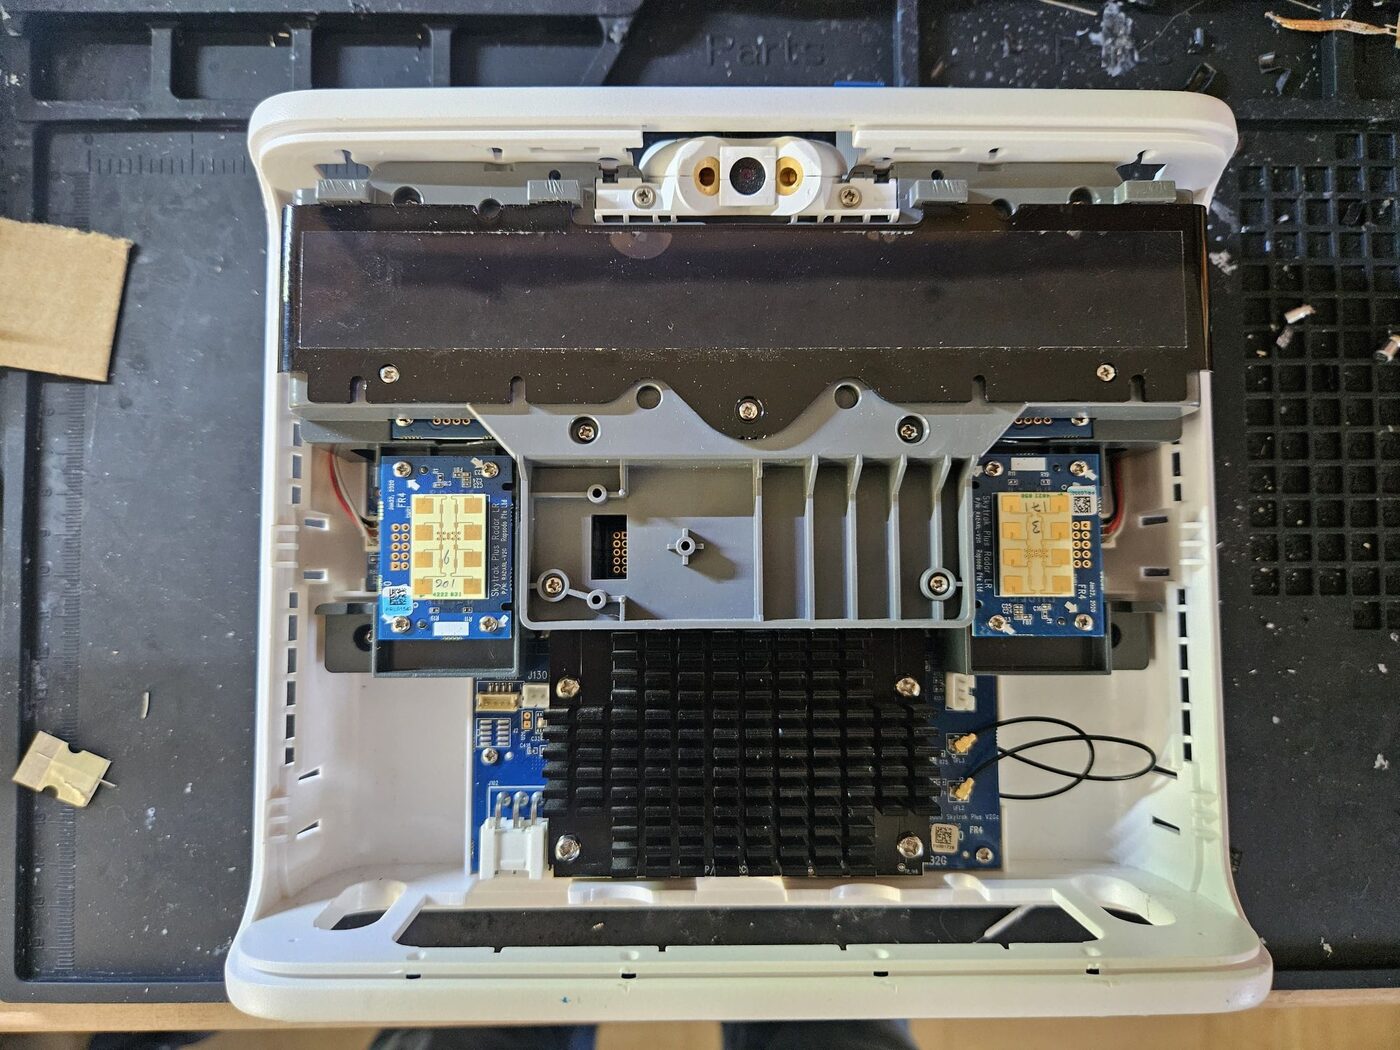
Top cover off. The black shield still covers the camera and flash boards.
Step 7. With the top cover off, the front panel comes away.
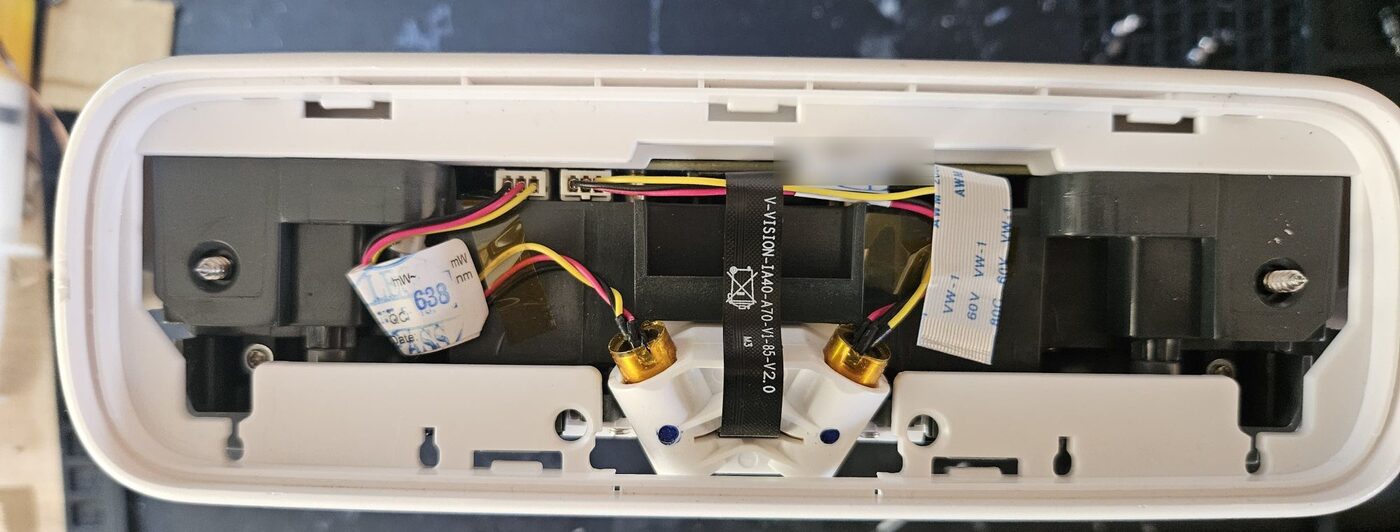
Front panel removed. The white module at the top of the unit holds two lasers, the brass barrels, with a small camera in the centre.
Step 8. Lift out the black shield and the sensors are exposed: the main camera in the middle, a flash LED board either side of it and the two radar boards, with the laser and camera module at the top. The USB-C socket is underneath all of this, beside the power button, so everything had to come out to reach it.
The sensors sit in locating features, but they are what the SkyTrak+ uses to measure your shots, so we photographed and marked every board and cable before it came out, kept the screws in order, and didn't touch any lens or window.
Replacing the socket
With the old socket off, the important question was whether the board underneath had survived. It had. All the signal pads on the two rows of the USB-C footprint were intact. One of the socket's anchor points had torn a small crater beside them, but no pads or tracks had lifted, so the repair could go ahead as quoted.
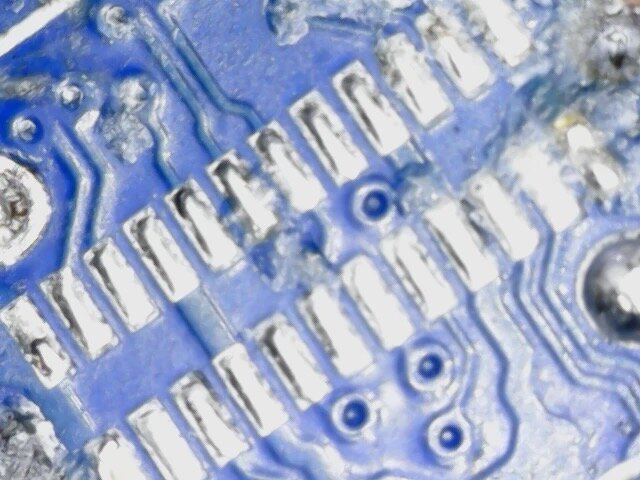
The USB-C footprint after the old socket came off. Both rows of pads survived.
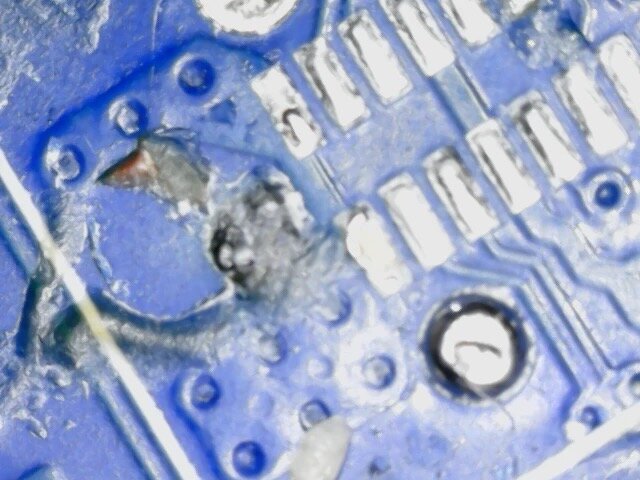
Where one of the socket's anchor legs tore out of the board.
Before fitting the final socket, we proved the board's side of the port worked. A USB-C port needs more than power and ground. It also needs two small configuration connections that tell a USB-C charger it's safe to switch on. Without them the unit only charged at about 0.5 A from a basic 5 V supply and wouldn't charge at all from a USB-C charger or a laptop. With them connected it charged at about 2 A from every supply we tried, a Windows PC recognised it as a USB device, and the SkyTrak app connected in USB mode.
The replacement is a 24-pin USB-C socket, the full type with both rows of pins, matching the original footprint. The board's mounting holes don't match a standard off-the-shelf socket, though, so its legs had to be modified to fit, and it sits at a very slight angle. Like the original, it's bonded to the board with epoxy, which is how the factory secured it in the first place.
Putting it back together and testing
The sensors went back into their locating features, the front panel was re-secured, and the unit was closed up. Then we tested it:
- Charging from a USB-C charger with a USB-C to USB-C cable, and from a USB-A cable: both good.
- USB mode on a Windows PC with the SkyTrak app: connected.
- The app's device page showed the unit level (0.2° forward tilt, 0.4° roll) with the battery healthy.
We don't have clubs and balls on the bench, so we didn't do a shot test here. We asked the owner to hit a few shots with a club they know well and tell us if anything looks off.
We also told the owner about the front panel posts, the clip marks and the slightly angled socket before the unit went back, rather than leaving them to find out.
If your launch monitor won't charge
If you have to hold the cable at an angle to charge, stop using it that way. Every wiggle works the socket further loose, and on this unit it had already pulled almost all of its legs free. Sealed devices like launch monitors take far longer to open than a phone or a controller, so we start with our £40 assessment. We open the unit, find out exactly what has failed and tell you whether it's repairable. If it is, you get a firm quote with the £40 already taken off, and nothing goes ahead without your OK. If it isn't, it comes back to you by tracked post with nothing more to pay.
See our USB-C port repair service for how to send your device in.